Expert Advice
Boost Your Amateur Fishing Photography from Average to Awesome
Feb
With the popularity of Instagram, our exposure to—and desire to create—memorable fishing photography has never been higher. At the same time, the power of most modern cell phone cameras puts to shame the image quality of most point and shoots from even five years ago. That said, there’s far more to taking a good photo than just the number of megapixels.
Taking good photos is about far more than just the camera. In this blog, Field Team member Tom Johannesen helps you go beyond the megapixels to up your fishing photography game.
*Note: all photography in this article was taken by amateur photographers, Islander fans, and Field Team members.
Capturing the Perfect Image
 It doesn’t sound all that difficult to have an angler hold up his prized catch and smile while his fishing buddy points the camera and taps the shutter to take the perfect picture but there is a actually little more to it then that. The most important part of getting that perfect shot is having a subject matter that is worthy of that image. What this means is we need a good subject matter whether it’s a tight shot of a fish, a breathtaking sunset or a priceless grip and grin.
With the use of a cellphone or simple point-and-shoot camera, images can be taken that only an expensive camera could capture in the past. Like with high-end cameras, cellphones and point-and-shoots also have many settings to help take a better picture. I know as men we are too proud to read directions and instructions but when it comes to maximizing a cameras true potential we need to read the manuals or watch a tutorial.
Traditionally, the most commonly used settings were the macro, red-eye reduction and scenery modes. It’s good to use these on a regular basis but I also find the fill flash and stabilization modes work well too. I also recommend exploring the settings on your phone to know what custom options the manufacturer has included—again, watch a tutorial and you’ll be surprised at how many tools are available to you.
 Many cellphones now offer dual or even triple lens cameras that—combined with high-quality processors and sensors—allow for simulated telephoto functionality, eliminating the grainy zoom functions of cellphones past. The portrait mode uses the multiple lenses to change the depth of focus (i.e. blurring the background so that only your fish or fisherman is in focus) for DSLR-esque portrait photos. The good thing is you can practice taking all the photos you want and delete the ones you don’t like—more on that later.
Look the Part
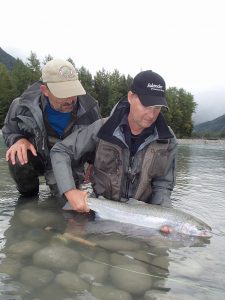
One of the most common issues I see when anglers are looking for that shot of a lifetime is not looking the part. When I say look the part, I’m referring to wearing angling gear and not a t-shirt with a beer logo printed on the front of it.
 It’s important for anglers to wear dark drab clothes for camouflage but they tend to look lifeless in a photo. By wearing a little color such as a light shirt or hat, the subject comes to life and stands out in the picture. I always tell my buddies to wear hats with logos of products they like fishing with.
I should not have to say it but don’t be afraid to smile, in many cases this is a fish of a lifetime and the angler should look like they are busting with excitement.
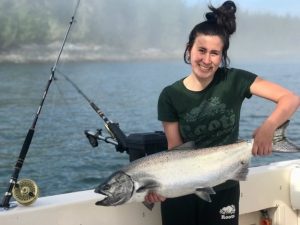
Take a Variety of Shots
Digital photography allows us to do things that were impossible in the past. Many of us were brought up on 35 mm cameras and crossed our fingers while the role of film was being developed. Often times our ideal image didn’t come out the way we remembered and we ended up a little disappointed when we got our pictures back from developing.
As it doesn’t cost anything to take digital images, don’t be afraid to take numerous shots of the same subject. I always take verticals and horizontals of the same subject as you never know what type of frame you may put them in. As for the professional side of fishing photography, you can only sell a cover image taken in a vertical format.
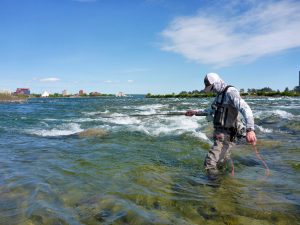 Another important aspect of taking photos for publication is taking action shots. It’s nice to have grip and grins shots but there is nothing more exciting than a shot with the angler’s rod bent over and the fish leaping in the background. This is where the compact cameras and cell phones are a great asset. These light weight cameras can be easily kept in a vest or jacket waiting for that special moment.
Slight Alterations can be a Good Thing
If the shot doesn’t come out exactly how you were hoping it can be altered with the use of a photo shop program or app. Instagram has some basic editing software, but apps like Snapseed or Photoshop Express are much more powerful and still free. In the digital world a minute of alteration can save an image that in the past would have never made it.
To make the most of this software, watch a tutorial or read the manual and put the info to use while sitting around the campfire.
 A little photo shop never hurt any photo when done in moderation. The key to cleaning up a photo is less is more. By over doing it the photo will not look natural and tends to look a little washed out. Start by brightening or darkening the selected image and try to keep it as natural looking as possible. Most programs also have a sharpen option but again bump it up just enough to keep the lines clean. I always say if it looks altered to the viewer then it is overdone.
Getting that Great Underwater Shot
If you’re in the market for a new phone or camera, I highly recommend purchasing a waterproof model. In the past cameras had to be placed in a large cumbersome plastic boxes to get a below surface shot. Needless to say, they were hard to work with and cost an arm and leg. Now you can buy a waterproof camera for as little as two hundred and fifty dollars and many cellphones are now waterproof. Either choice will open a whole new world of photographic possibilities.
When you’re spending time on the water where unpredictable weather reigns, the waterproof functionality can help save the day. Regular DSLR cameras do not like any sign of moisture but with a waterproof camera, you can shoot in the rain without fear.
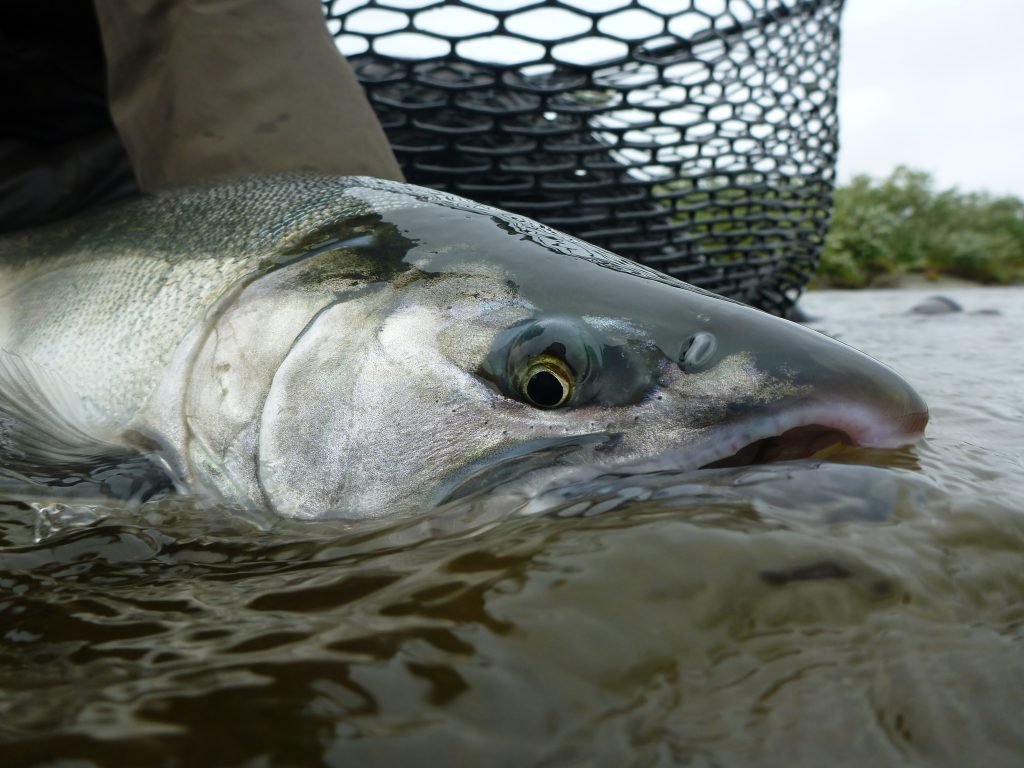
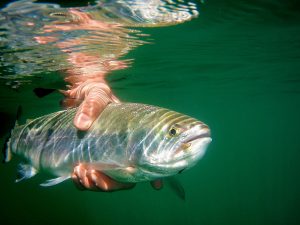 Over the years I have found the best underwater shots are taken by one person only. I simply hold the fish in my left hand while snapping the shot with my right. The nicest fish shots are taken when the fish is half under the water and the camera is held right on the waterline.
I find it is best to take a few shots above the waterline first then slowly move the camera under the water snapping shots along the way. This too is another advantage of the digital world, you can snap all the shots you want and dump the ones you don’t like while sitting in the comfort of your home.
When taking underwater shots during regular day light it is best to turn off the auto flash as it tends to wash out the image. Taking shots of fish at the waterline is easy and many times results in priceless images.
The key is to make sure the camera is level both vertically and horizontally. There is nothing worse than a horizon on a forty-five degree angle. I find that the tighter the shot the better. Many times I just take the front three quarters of the fish with the fly still in the mouth. Even when taking fish shots above the surface, always take tight shots from the head back.
Common Mistakes when Taking a Photo
 There are a few common mistakes made by photographers on a regular basis. Often times the photographer tends to look at the subject in the foreground and does not check to see if the background is level. This is easy to fix by always paying attention to the background too.
When taking a picture on a sunny day use the sun to your advantage. The sun should light up the subject and be at the photographers back. If you shoot towards the sun the subject will generally come out dark. Other common mistakes include putting the subject in the centre of the shot and being higher than the actual subject when shooting. Again, both are very easy to correct once you make a conscious effort to look out for these things.
The rule of thirds implies exactly that. The subject whether it is a boat, tree, island or angler should be off to the side of the shot. As for not being higher than the subject, the photographer and angler should always be eye to eye. If the photographer is above the angler, the background ends up being the ground or water and not a nice scenic mountain range. In saying that, stand close to the subject and don’t rely on the zoom for the tight shots as it also magnifies any form of vibration. I usually get the best results when standing from five to seven feet from the angler.
Final Thoughts
By using a few of the simple tips mentioned about you too can get excellent images to share and cherish. I find fishing photography adds an exciting element to my time on the water, as it also allows you to share your prized catch with others without actually killing the fish.
An avid angler, seminar host, and writer, Tom Johanesen has had over 200 works published in a plethora of Outdoor Magazines. From his home base in Coquitlam, British Columbia, Canada, he explores his home waters and beyond.